Tuesday, February 28, 2017

"A Bit of Good Luck" Easy Shawl Knitting Pattern

I'm excited to announce my new shawl knitting pattern - "A Bit of Good Luck".  This shawl is knit with super bulky yarn so it's quick and easy to knit.  

This pattern is available on Ravelry, LoveKnitting, and Etsy.

"A Bit of Good Luck" shawl knitting pattern - quick & easy to knit.
This shawl is easy to knit and would make a lovely gift...to wish a friend or loved one "a bit of good luck".


MARCH 2023 UPDATE: The knitting pattern was recently updated to correct a typo.  In the abbreviations section a typo for K2tog has been corrected and now reads: knit 2 stitches together.

I made several test shawls before I finalized the design for this simple shawl pattern.  My goal was a design that would be very easy to knit, could be made at a low cost ($10 - $20 depending on choice of yarn), had a classic, timeless style and was easy to adapt to multiple sizes. (See info below about three size options.) After trying several ideas I think I achieved all of my original goals!

The shawl is knit side to side with a seed stitch border.  The main center section is stockinette stitch with balanced increases and decreases to create a gently curving shape for the lower edge of the shawl.  Click here for the updated tutorial for the M1L increase used in this pattern.

Easy to knit shawl pattern.

The pattern includes instructions for three sizes:

Small/Petite: 51" long x 13.5" wide (at widest point)
Medium: 55" long x 14" wide
Large: 59" long x 14.5" wide

All of the shawl sizes are about 7" wide at the ends.  It's also easy to make any of the shawl sizes longer by adding rows in the middle (back) portion.

The size shown in the photos is the small/petite version.  It's about 51 inches long and about 13.5" wide at the widest point.

"A Bit of Good Luck" shawl knitting pattern - it's easy to adjust the length.

This shawl is knit with super bulky yarn which makes it chunky, warm, cozy...and quick to knit.

"A Bit of Good Luck" Shawl shown in 'Vermont Green' Lion Brand Hometown USA
Blocking of the shawl is highly recommended!  Blocking makes a huge difference in the final appearance as it sets the shape of the shawl.

I have written about blocking several times.  For more tips and photos on blocking you might want to check out my full collection of tips on this blog post.

A couple key things...after soaking the shawl for several minutes in a sink full of water, carefully set it on an old towel to allow excess water to drain off.  Handle your knitting with care...do not wring or twist!

Handle wet knitting with care - do not wring or twist.
Another important part of blocking is to carefully arrange the knitting on the blocking surface.  The reason to block is to train the knitting to be neat and tidy with even edges...in the exact shape desired.  For this shawl, make sure the stockinette stitches in the main body of the shawl are straight from one edge to the other.  The photo below shows the straight stockinette stitches for the main body of the shawl, with the increase band curving gently to the right.

"A Bit of Good Luck" shawl - block carefully to shape.
Use T-pins to set the knitting in place after carefully arranging the knitting.

Use T-pins to hold knitting in place for blocking.
Of course, I picked green to go along with the pattern name..."A Bit of Good Luck"!  With St. Patrick's Day coming up soon it seemed like a fitting choice!  (If you are wondering...I'm about 3/8ths Irish.)

SUPER BULKY YARN:

I used Lion Brand Hometown USA in the color 'Vermont Green'.  I love this rich forest green!  If you have not used Hometown USA you might want to give it a try...it's very soft to the touch and very enjoyable to knit.  If you are sensitive to wool this could be the perfect choice for you as it has no wool content.  Also, this yarn is a very economical choice...I spent about $12 for the yarn to make this shawl. (As I said above...my goal was to design a classic shawl that doesn't cost a lot to make.)

When I was looking for green yarn I found that there are a lot of choices!  Of course, you can use any color for your shawl but I thought it would be fun to share the choices of greens that I found for a few super bulky yarn options:

Lion Brand Hometown USA - look for these colors on Lion Brand Yarn's website:

'Vermont Green': dark forest green (shown above in shawl)
'Green Bay': true kelly green - bright St. Patrick's Day green (see photo below)
'Oklahoma City Green': avocado green (see photo below)
'Saint Louis Sage': soft grayish, slate green
'Grand Rapids Green': bright green
'Montpelier Peacock': dark, rich, slightly bluish green
'Savannah Sage': light, soft green

'Green Bay' in Lion Brand Hometown USA is perfect for St. Patrick's Day!

'Oklahoma City Green' in Lion Brand Hometown USA
If you like a woolish texture for your yarn, try Lion Brand Wool-Ease Thick & Quick.  It is available in a few green shades including: 'Grass' and 'Cilantro' (an earthy green),

Another yarn option is Loops & Threads Cozy Wool.  Cozy Wool is a blend yarn that includes a bit of wool. This yarn comes in several green shades including 'Spearmint' (bright aqua green), 'Thunder Blue' (dark teal), 'Moss Green' (earthy green), 'Sweetgrass' (light avocado green).  This yarn is sold only at Michael's Crafts.

This pattern would also work well with variegated or multi-colored yarns, including hand dyed yarn.

An easy to knit chunky shawl - "A Bit of Good Luck".
Since this shawl was specifically designed for use with super bulky weight yarn, I am unable to assist with questions regarding how to adapt this pattern for lighter weight yarn.  This pattern could be adapted for lighter weight yarn but that would require writing a whole new pattern!  Thanks for understanding!

"A Bit of Good Luck" shawl knitting pattern is now available on Ravelry, LoveKnitting and Etsy.

You may have read on my previous post that I have been participating in the #YarnLoveChallenge on Instagram during the month of February.  Since this blog post has been filled with green I thought I would share my photo from day 16 when the theme was "happy color".

My favorite color has always been blue!  I have used various shades of blue yarn for several of my knitting projects in the last couple of years.

my 'happy color' = blue
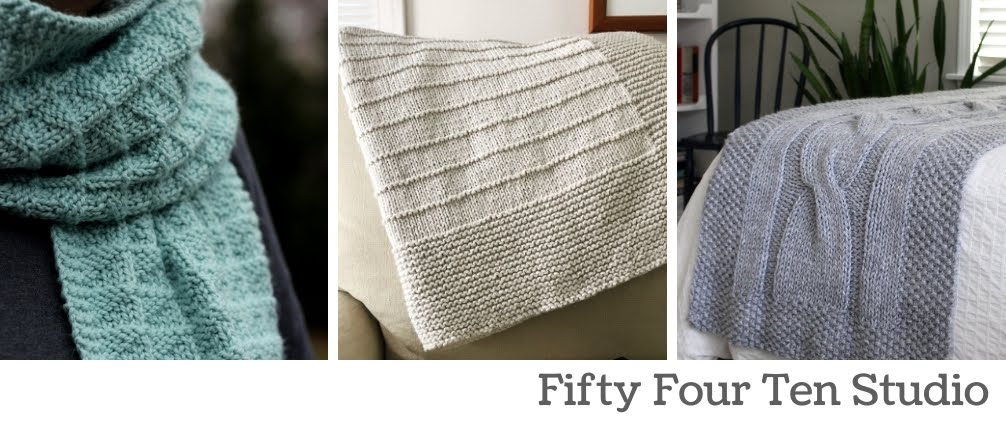
Patterns shown in the collage are listed below.  Click to read more about these patterns on my blog.
The Parkway Pillow (top left)
Belleview Blanket (top right)
The Boulevard Blanket (lower left) - always free pattern
Third Street Blanket (lower center)
Felt Applique Mitten Ornament (lower right)

Thanks so much for reading and for your interest in my knitting projects!

Wishing you a bit of good luck in the days to come! :)

Mary Lee
Fifty Four Ten Studio

"A Bit of Good Luck" easy shawl knitting pattern.

Monday, February 27, 2017

Knitter's Questions: Clean Edges, Right & Wrong Side of Garter Stitch, and Knitting a Blanket with Circular Needles

Today I thought it would be fun to share some tips based on a couple questions that I received from knitters in the last few weeks.  I especially enjoy being able to help beginning knitters gain more confidence in their knitting.  Some of these questions might seem 'basic' to experienced knitters but I suspect other beginners might find these notes helpful.

Here's the three topics covered below...

1. How do you get such 'clean' edges in your patterns?
2. How do you identify the right and wrong side of garter stitch?
3. How do you use long circular knitting needles to knit a blanket?

How do you get such 'clean' edges in your patterns?


I tend to obsess about the edges! Here's the three things I focus on for the edges:

1. Pull the first stitch of each row a bit tighter: When I am knitting I pull the yarn a bit tighter when I work the first stitch of each row.  Some knitters like to slip the first stitch or the last stitch of a row...but I don't...especially on blankets or scarves that do not have seams.

Pull the first stitch of each row a bit tighter for a clean edge.

2. Change skeins of yarn mid-row: When I am knitting a blanket or other project where clean edges are important...I make mid-row transitions from one skein of yarn to the next. When a project doesn't have seams I would rather hide woven in ends in the middle of the row.

Weaving in ends on back of project...in the middle of rows.

3. Careful blocking: Taking the time to carefully block a finished blanket or other knitted object is essential. It's really important to carefully pin the knitting in exactly the shape desired with very straight edges so that the knitting will look the best when dry. I have written about blocking several times here on my blog including on this post and this post. (Scroll down a bit in both posts to find the step-by-step tips about blocking.)

Careful blocking includes pinning the edges in place.
In case you are wondering...the pattern shown in the photo above is my Third Street Blanket. Read more about the pattern here on my blog post.

How do you identify the right and wrong side of garter stitch? 


A couple of my blanket patterns have garter stitch edges.  For me, deciding on the right and wrong side when working with garter stitch is determined by my cast on row.  I use a basic long-tail cast on method and one side always looks better than the other.  I pick to have the "nice looking" side of the cast on edge be the right side (or front) of my knitting...and the side that doesn't look as nice is the wrong side.  Here's a couple close up photos:


Once you decide which side is the right and wrong side of your knitting, it can help to pin a marker on the knitting to help remember.  For example, in my Where the Sidewalk Ends and Westport Blanket knitting patterns, it is important to keep track of which side is the wrong side because that is where the main stitch changes are made. Pinning a marker or tying a loop of contrasting color yarn to the wrong side of your knitting will make it easy to remember which side is the wrong side.  (I need to use this tip because several times I have had to rip back several inches of knitting when I realized I had mixed up the right and wrong side!)

How do you use long circular knitting needles to knit a blanket? 


A few weeks ago I received a nice email from a knitter who was confused about the concept of using long circular knitting needles to knit a blanket. She had only used straight needles for knitting...and I think she realized that she would not be able to fit enough stitches on the straight needles to knit a large blanket. She said that she had a hard time visualizing how to use circular knitting needles to knit a blanket.  I'm so glad she emailed me...she said the info below helped her understand the concept!

Here's what I shared with her about knitting a flat piece with circular knitting needles...

To use circular needles for a big blanket you are really using them like super long straight needles...that happen to be connected by a long wire.  Cast on stitches the same way you do with straight needles.  Start knitting the same way you do with straight needles.  When you get to the end of the row of knitting...just turn your knitting around the same way you would with straight needles.

Circular needles are often used to make hats and knitters just keep knitting around and around and around so all of the rows are connected.  This is called "knitting in the round". Circular knitting needles can also be used to work "flat" knitting (as described in the last paragraph) and are especially helpful when working with a lot of stitches...such as knitting a blanket.  The other benefit of using circular knitting needles is being able to spread out and view your knitting as it progresses.

Using circular knitting needles to knit "flat" - it's easy!
In case you are wondering...the pattern in the photo above is The Parkway Pillow.  Read more about it here on my blog.

If you have not tried knitting with circular knitting needles, give it a try!  Many knitters, including me, use circular knitting needles almost all the time because you don't have the ends of long straight needles to manage.

Knitting flat...back & forth...on circular knitting needles.
If you have a question when working on one of my patterns please feel free to contact me. The best way to reach me if you have a question is to use the email address provided in the pattern.  I usually check my email multiple times a day and try to respond in a timely manner.

I love hearing from my knitting customers! It's so fun to hear how knitters plan to use my patterns as gifts for others including...knitting blankets to donate to a charity that is meaningful to them, making a blanket for a grown child moving into their first apartment or a grandchild going off to college, or knitting a blanket in anticipation of welcoming a new baby to the family.  It means so much to hear that knitters are using my patterns to commemorate milestone moments in their family's lives!  And...I am often touched to tears when I read about the meaningful charities where my customers are donating their hand knit blankets.

Thank you for sharing your stories with me. I love hearing from you by email (my email address is in all of my patterns and it's the best way to reach me with questions!), comments here on the blog, or through Ravelry or Etsy messaging. Drop me a line anytime!

Happy knitting!

Mary Lee
Fifty Four Ten Studio

p.s. Here's one more tip...I just finished reading "A Gentleman in Moscow" by Amor Towles.  It's very good!  This author also wrote "Rules of Civility"...also a great book! (Blanket in photo below is my Westport Blanket.)

A good book & a cozy, hand knit blanket go together!

Thursday, February 23, 2017

Knitting Tutorial: M1L & M1R Increases

There are several ways to increase stitches when knitting.  

This tutorial focuses on the "make one" technique which can be used to make a left leaning stitch or a right leaning stitch.

This tutorial is for increases made with knit stitches (not purl stitches)...working knitwise.

How to: M1L = make one stitch left leaning (knitwise)

Make one (1) stitch by picking up the ladder stitch from the front and knitting through the back of the stitch. 

Step by step instructions...

1. Separate the needles slightly to locate the ladder between stitches:

Step 1: locate ladder between stitches
2. With the left hand needle, pick up the ladder by inserting needle from the front towards the back.

Step 2: pick up ladder stitch from the FRONT
3. Knit this picked up stitch by inserting the right hand needle through the back of stitch.

Step 3: insert right hand needle through BACK of stitch
4. Wrap the right hand needle and complete as for a knit stitch.  One new left leaning stitch made!

Step 4: wrap right hand needle & complete as for a knit stitch

How to: M1R = make one stitch right leaning (knitwise)

Make one (1) stitch by picking up the ladder stitch from the back and knitting through the front of the stitch.

Step by step...

1. Separate the needles slightly to locate the ladder between stitches:

Step 1: locate the ladder between the stitches
2. With left hand needle, pick up the ladder by inserting the needle from the back towards the front.

Step 2: insert needle from the BACK to pick up ladder
3. Knit this picked up stitch by inserting the right hand needle through front of stitch.

Step 3: knit by inserting right hand need thru FRONT
4. Wrap needle and complete as for a knit stitch.  One new right leaning stitch made!

Step 4: wrap needle & complete as for a knit stitch

Here's an example of completed M1 stitches:


Monday, February 13, 2017

Favorite Photos from the #YarnLoveChallenge

As you may have read in my previous post, this month I am participating in the #yarnlovechallenge over on Instagram. The organizers of this fiber themed challenge came up with themes for each day of the month in February 2017 and encouraged any yarn enthusiasts to share their photos related to the themes. It's been so fun to participate and I particularly like the themes for the second week of February and thought it would be fun to share a few of those photos here on the blog...in case you missed them.  

The theme for day 8 of the #yarnlovechallenge was "where I craft".  This photo was taken in my home studio where I spend a lot of my time.

My home studio.
I bought the sturdy, white table for my first college apartment many years ago.  This table is fantastic for crafting.  I love the durable white surface and it fits in right next to a big east facing window so I have lots of natural light.  My husband built an awesome desk and cabinets that run along the wall (behind the table).  That's where I have my computer and printer.  We live in an old house and this room was originally the kitchen when the house was built in the 1940's.  In case you are wondering...the grey blanket draped on the chair in the center of the photo is my Over the Rooftops blanket knitting pattern.  The blue blanket on the table was made using my free knitting pattern...The Boulevard Blanket.  The blue yarn is Lion Brand Hometown USA in the color 'Washington Denim'.

The theme for day 9 of the #yarnlovechallenge was "tools".  I love knitting tools!  It was fun to create a flatlay design using some of my favorite knitting tools...plus a few old treasures...

Some of my favorite knitting tools.
The Susan Bates US 13 straight knitting needles on the right are from the 1980's.  I haven't used them in years!  These days I primarily use circular knitting needles for flat knitting (working back and forth just like with straight needles) and double pointed needles for hats and other small in the round projects. My stitch markers, tape measure, tapestry needles and old Susan Bates gauge ruler are a few of my most used little tools.  I use a clip board with paper or a simple spiral notebook to keep notes when I am working on a new knitting design. I always have several ballpoint pens and basic pencils handy for taking notes, editing patterns, jotting down pattern name ideas, etc.

The theme for day 10 brought back a lot of memories..."oldest stash".  I pulled out my bin of really old yarn and dug to the very bottom to find some of these yarn treasures from the 1980's...

My oldest stash yarn.
I bought a lot of this yarn when I was in high school and college when I worked a couple summers in a little yarn shop.  Apparently I spent a lot of my earnings on yarn!  I knit mohair sweaters with the ivory and blue yarns (top corners).  A mohair sweater sounds dreadfully itchy to me today!  But...I did wear those sweaters. The raspberry colored yarn is alpaca and I knit a very soft, over-sized sweater for myself with that yarn.  I used the medium gray blue yarn (center) to knit a short sleeved pullover top that I wore many times in the spring and summer.  The greenish and gray blue yarns in the lower right of the photo are Brown Sheep Lamb's Pride Worsted. I knit many sweaters with various colors of this reliable yarn back in the 80's and 90's.  In more recent years, I used up some of my leftover Lamb's Pride Worsted by knitting hats and mittens for my kids.  The ivory ribbon marketed for knitting and crochet was purchased in the 80's.  I never used it for knitting so these days I use it for wrapping packages and as a background prop in my knitting photos.

"Travel Projects" was the theme for day 11.  My favorite travel project is to visit a local yarn shop and bring home some beautiful yarn as a memento of the trip. I also love going to local book stores when I'm on a trip. Books and yarn are my favorite souvenirs!

The Yarn Barn in Lawrence, Kansas & Purl Soho in New York City.
 Last weekend I took a day trip to Lawrence, Kansas with my daughter.  It's only about 40 minutes from our house.  We went to Mass Street Music for her to check out some guitar accessories.  It's a really nice guitar store!  We also stopped in The Yarn Barn which is a lovely little yarn shop on Massachusetts Street.  (Locals call it "Mass Street".)  The Yarn Barn carries a great selection of yarn for knitting and crochet, as well as a huge section of supplies for weaving. (If you are interested, they print a beautiful annual catalog filled with their products.) I bought some beautiful yarn...see photo below.  One year ago I went to New York City and loved having the opportunity to go to Purl Soho. Their wall of yarn is gorgeous!  (FYI: check Purl Soho's hours before you go...when we were there they did not open until noon.)  Also...I would suggest previewing their yarn online before you go so you have an idea of what to look at first.  There's so much to see in this small but well stocked store!

Here's the gorgeous yarn I purchased at The Yarn Barn last weekend.  It's Malabrigo Rasta - a super bulky weight yarn that is kettle dyed.  The color is called 'Solis'. I'm making plans for this yarn!

Malabrigo Rasta - kettle dyed yarn in 'Solis' #809
Now I should get back to working on one of my knitting projects. I have a couple things in the works. Honestly...one idea has been slow to come together.  Trying new ideas takes time and patience!

If you would like to see more behind the scenes photos and follow along with the #yarnlovechallenge follow me on Instagram...@fiftyfourtenstudio.

Hope you have a wonderful week!  Happy Valentine's Day!  Happy knitting!

Mary Lee
Fifty Four Ten Studio

Monday, February 6, 2017

Three Year Blog Anniversary!

This week marks three years since I started this Fifty Four Ten Studio knitting blog!  It's been such a fun way to share my knitting patterns, extra details about my patterns, knitting tips and behind the scenes photos of my work in progress. It also helps me record my progress on my knitting endeavors. I really appreciate all who have read my blog!

This month I'm participating in a fun "challenge" on Instagram called the #yarnlovechallenge. If you have not heard about it...the organizers set up the @yarnlovechallenge Instagram page and posted a list of themes for each day for the month of February 2017.  The idea is for any yarn enthusiasts to share photos based on the daily theme.  Themes include: "currently making", "stripes", "where I craft", "tools", "happy color", "yarn love", and more. They came up with a great list of ideas and it's been fun to decide what to share on each day.

In case you are not in Instagram, I thought it would be fun to share a couple of the photos I used...

The theme for Day 1 of the #yarnlovechallenge was "introductions".  This is a photo of me taken on the first day of school...either 2nd or 3rd grade.  I picked this photo because my mother taught me to knit when I was about this age.  As a girl I loved to sew, design clothes for my dolls, knit draw and paint.  I love this photo...my navy blue sailor dress, my metal lunch box, the red ribbons in my hair, the wallpaper in the kitchen of my childhood home, and the umbrella hanging on the doorknob...it all brings back a lot of wonderful memories.


The theme for Day 5 of the challenge was "community".  I made a collage of favorite photos that all relate to my community...Kansas City.  I have lived in the Kansas City area my entire life.  I love my hometown!  We're right in the middle of the US...some call this "fly over country" but those of us who have lived here a long time know we have a lot that makes our city special....friendly people, great BBQ, the amazing Kauffman Center for the Performing Arts, the Kansas City Royals baseball team and so much more.  See below for details on this collage of photos.


Kansas City - my community - my hometown. 
Here's the details on this photo collage...starting at the top left and working row by row:

1. The Parkway Pillow - my knitting pattern named for Ward Parkway, one of the prettiest and most well known streets in Kansas City.

2. Meyer Circle Fountain - it's located along Ward Parkway and is representative of the many fountains in our city.  Kansas City is known as "the city of fountains".

3. Brookside Blanket knitting pattern - named for the neighborhood where I grew up.

4. Shuttlecock sculptures at the Nelson-Atkin's Museum of Art - our world class art museum!  These sculptures were very controversial when they were installed in 1994.  Now, they are a KC landmark!

5. My Third Street Blanket knitting pattern - the name was inspired by the old River Market area in KC.

6. Sunflowers in Kansas - a photo I took at Grinter Farms in September 2016.  Their sunflower farm is absolutely beautiful...but best to avoid the crowds by going out there during the week.

7. My Westport Blanket knitting pattern - named for one of the oldest neighborhoods in Kansas City.

8. State Line Road - about half of the KC metropolitan area is located in Missouri and half in Kansas.  (I live in Kansas!)

9. The Boulevard Blanket - my free knitting pattern named in honor of our beautiful KC boulevards.  An old promotional slogan for KC was "More boulevards than Paris, more fountains than Rome."

The theme for Day 4 of the #yarnlovechallenge was "speed".  I used this photo...more below...

The Boulevard Blanket - a free knitting pattern.
In terms of speed as it relates to knitting...I am a very slow knitter and I'm ok with that!  I've seen videos on Instagram of knitters who knit so fast it makes me anxious.  It doesn't look relaxing at all to me!  For me knitting is about the process...not about how quickly I finish a project.

The pattern I used for the blue blanket above is my always free pattern...The Boulevard Blanket.  It's very easy to knit with super bulky yarn.  The yarn I used is Lion Brand Hometown USA in the color 'Washington Denim'.  This yarn is so soft and cozy.  It's very economical but don't let the low price fool.  The price is low but the quality is nice.  It's not "sticky" like some acrylic yarns.  I really enjoy knitting with this yarn!  It comes in a wide variety of colors.  I particularly like the softer, muted colors like 'Dallas Grey', 'Houston Cream' and 'Washington Denim'.

I have a couple of projects in the works right now.  Sorry no details ready to share yet but I'm really excited them and I'll post info as soon as it's ready!

January 2017 was a record month for my pattern sales on Ravelry, Etsy and Craftsy!  I am so appreciative of all the purchases and kind feedback on my patterns!  THANK YOU! 

In the past couple weeks, I've enjoyed helping a couple of knitters via their email questions. One knitter told me that she taught herself to knit using online videos. I was so impressed especially because her stitches were so well done with very even tension. It's very hard to teach a new knitter how to achieve even tension! I was so happy to be able to help her as she worked on my Where the Sidewalk Ends blanket.  I was thrilled to receive her email a couple days ago with a photo of her beautiful finished blanket!  If you ever have any questions when using one of my patterns, email me using the email address provided in the pattern. I'm happy to help!

Thanks so much for reading this long post!  If you would like to know more about the #yarnlovechallenge you can check out the @yarnlovechallenge Instagram page or see all my photos related to the challenge on my Instagram page.

Have a great week!  Happy knitting! :)

Mary Lee
Fifty Four Ten Studio